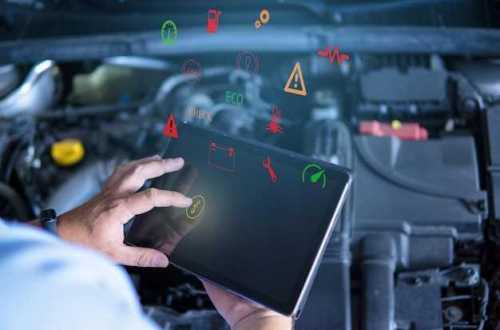
When the check engine light illuminates on your dashboard, it can trigger a wave of concern for many drivers. This warning sign typically indicates that the vehicle’s onboard diagnostics system has detected an issue that requires attention. Ignoring this light can lead to more significant problems down the road, making it essential to understand the steps you should take when it appears.
First and foremost, it is crucial to perform a quick visual inspection of your vehicle. Check for obvious issues such as loose gas caps, leaks, or abnormal sounds. These preliminary checks can sometimes clarify whether the problem is minor or more serious. If everything appears normal, the next step is to run a diagnostics scan using an OBD-II scanner, which can provide specific error codes related to the engine’s performance.
After retrieving the codes, it is advisable to research their meanings or consult a professional mechanic. Understanding the specific error codes can help you identify the root cause of the issue. Depending on the severity, you may need to take immediate action, from tightening a gas cap to scheduling a comprehensive diagnostic assessment with a qualified technician to address potential engine problems.
Identify Common Causes of the Check Engine Light Activation

When the check engine light activates, it can signal various issues that require immediate attention. Understanding the common causes can aid in diagnostics and help prioritize actions. One of the most frequent causes is a loose or damaged gas cap. This simple issue can lead to fuel evaporation and trigger the light, indicating a need for resealing or replacement.
Another common reason is a faulty oxygen sensor. This component monitors the amount of unburned oxygen in the exhaust and plays a vital role in managing engine efficiency and emissions. If it malfunctions, it can affect fuel economy and lead to increased emissions, prompting the check engine light to illuminate.
Additionally, issues with the mass airflow sensor (MAF) can cause the light to turn on. The MAF sensor measures the amount of air entering the engine, which is essential for optimal fuel mixture and performance. A defective sensor may disrupt this balance, resulting in poor engine performance and triggering diagnostics.
Problems with the spark plugs or ignition coils can also activate the check engine light. These components are crucial for proper engine function, and if they fail, it can lead to misfiring, reduced power, and increased fuel consumption.
Lastly, catalytic converter failure can result in engine performance issues and will certainly trigger the check engine light. This critical component aids in exhaust emission control, and any malfunction can significantly impact engine efficiency and overall vehicle operation.
Identifying these common causes can streamline diagnostics and facilitate timely repairs, ensuring your engine operates smoothly and efficiently.
How to Read Diagnostic Trouble Codes Using an OBD-II Scanner
Reading diagnostic trouble codes (DTCs) is an essential step in vehicle diagnostics when your check engine light illuminates. Using an OBD-II scanner simplifies this process and helps identify the underlying issues affecting your vehicle. Follow these steps to effectively read DTCs.
1. Locate the OBD-II Port: The OBD-II port is typically found under the dashboard, near the driver’s seat. It may be covered by a panel or protective cover. Ensure you position yourself comfortably to access it.
2. Connect the OBD-II Scanner: Plug the OBD-II scanner connector into the port. Ensure it fits snugly to establish a proper connection. Some scanners may power on automatically, while others require you to turn the vehicle’s ignition to the “ON” position without starting the engine.
3. Power on the Scanner: If the scanner does not turn on automatically, use the power button to activate it. Once initiated, the scanner may perform a self-check to ensure its functionality.
4. Select the Diagnostics Menu: Navigate through the scanner’s menu using the directional buttons. Look for the option labeled “Diagnostics” or “Read Codes.” Selecting this will allow the scanner to communicate with the vehicle’s onboard computer.
5. Read the Diagnostic Trouble Codes: After initiating the diagnostics, the scanner will retrieve any trouble codes stored in the vehicle’s system. These codes are alphanumeric and can range from P0010 to P9999. Take note of these codes for further analysis.
6. Interpret the Codes: Each DTC corresponds to a specific issue. Consult the scanner’s manual or an online database to decode the numbers and understand what they signify. This step is crucial for determining the next steps in resolving the problem.
7. Clear the Codes (Optional): After addressing any issues, you may choose to clear the trouble codes from the system. This step resets the check engine light. Ensure that the underlying issue is resolved before doing this, as failure to address the problem may lead to the light reactivating.
Using an OBD-II scanner is a straightforward method for diagnostics. Regularly performing this task can help maintain your vehicle’s performance and prevent future issues related to the check engine light.
When to Consult a Professional Mechanic for Further Inspection

If your check engine light remains illuminated after attempting basic troubleshooting, it is essential to consult a professional mechanic for further inspection. Ignoring persistent warning signals can lead to severe engine issues and costly repairs in the future.
First and foremost, when you notice unusual engine behavior such as strange noises, reduced performance, or unusual smells accompanying the check engine light, it is time to seek expert diagnostics. These symptoms can indicate underlying problems that require immediate attention.
Secondly, if your check engine light is flashing rather than staying steady, this signals a more urgent issue, often related to severe engine misfires. In such cases, driving the vehicle can cause extensive damage, making it critical to bring your car to a mechanic without delay.
Additionally, if you have already conducted preliminary checks – such as examining the gas cap, reviewing fluid levels, and scanning for OBD-II trouble codes – and are still unsure about the cause, professional diagnostics equipment can provide in-depth insights. A skilled mechanic utilizes specialized tools to accurately diagnose complex engine problems that standard checks cannot resolve.
Lastly, if you are unfamiliar with automotive technology or lack the necessary tools for deeper inspections, relying on a mechanic’s expertise is advisable. They can not only identify the issue but also recommend appropriate repairs or maintenance to restore your engine’s optimal performance.


