

Every car owner knows that maintaining the vehicle’s appearance is crucial. One of the most common issues faced is the presence of scratches on the paint. These blemishes not only affect the aesthetic appeal but can also lead to more significant damage if left unaddressed. Fortunately, there are effective methods for repairing those annoying scratches and restoring your car’s finish.
Understanding the type of scratches you are dealing with is the first step in the repair process. Some scratches are superficial, affecting only the clear coat, while others may penetrate deeper into the paint layer. Identifying the severity of the damage will guide you in choosing the right repair technique, ensuring that your efforts yield the best results.
In this article, we will explore various tips and techniques for removing scratches from your car’s paint. From DIY solutions using household items to professional-grade products, you will discover how to effectively tackle each type of scratch. With the right approach, you can restore your car’s exterior and keep it looking as good as new.
Identifying the Type of Scratches on Your Car
When it comes to repairing scratches on your car’s paint, the first step is to identify the type of scratches you are dealing with. Understanding the severity and depth of these blemishes will guide you in choosing the right repair method.
Scratches can generally be categorized into three types: clear coat scratches, paint scratches, and deep scratches. Clear coat scratches only affect the outer layer of the paint, making them the least severe. These scratches are often barely visible and can usually be repaired using polishing compounds or scratch removers.
Paint scratches penetrate deeper, affecting the colored layer of the paint. These are more noticeable than clear coat scratches and may require touch-up paint or more comprehensive repair techniques to restore the surface effectively.
Deep scratches are the most severe, extending through the clear coat and paint layers, potentially reaching the metal beneath. These scratches typically necessitate more extensive repair, often involving sanding, repainting, and clear coating to achieve a seamless finish.
Accurately identifying the type of scratches on your car will streamline the repair process and help you achieve the best results in restoring your vehicle’s exterior. Make sure to assess the depth and visibility of each scratch to determine the appropriate methods for repair.
Step-by-Step Guide to DIY Scratch Removal Techniques
Removing scratches from your car’s paint can be a straightforward process if you follow the right techniques. Here’s a step-by-step guide to help you repair those unwanted blemishes effectively.
Step 1: Gather Your Materials
To start, you’ll need the following items:
- Car wash soap
- Microfiber cloths
- Scratch removal product (e.g., scratch remover paste or polishing compound)
- Wax or sealant
- Touch-up paint (if necessary)
Step 2: Clean the Area
Begin by washing the scratched area with car wash soap and water. Use a microfiber cloth to ensure you remove any dirt or debris. Dry the area completely to avoid trapping moisture underneath the repair materials.
Step 3: Assess the Scratch
Identify whether the scratch is superficial or deep. Superficial scratches typically do not penetrate the clear coat, while deeper scratches may reach the base paint. If it’s a deep scratch, touching up with paint may be required.
Step 4: Apply Scratch Remover
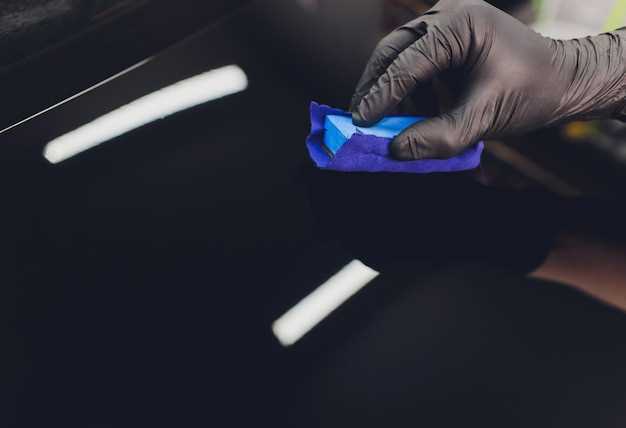
If the scratch is shallow, apply a small amount of scratch remover or polishing compound on a clean microfiber cloth. Gently rub the product into the scratch in a circular motion. Apply pressure but be careful not to damage the surrounding paint. Continue polishing until the scratch begins to blend in with the surrounding paint.
Step 5: Clean Again
After polishing, wipe the area with a clean microfiber cloth to remove any residue from the scratch remover. Ensure the area is smooth and clean.
Step 6: Use Touch-Up Paint if Needed
For deeper scratches, use touch-up paint that matches your car’s color. Carefully apply it to the scratch using a fine brush or toothpick. Allow it to dry completely, following the manufacturer’s instructions.
Step 7: Wax the Repaired Area
Once the scratch is repaired and dry, apply a layer of wax or sealant to the area. This will protect the newly repaired paint from future damage and enhance its shine.
Step 8: Final Inspection
After everything is dry, inspect the area. If necessary, repeat any of the previous steps to ensure the scratch is effectively removed. Regular maintenance and care will help keep your car’s paint looking great.
Aftercare: Protecting Your Car’s Paint Post-Repair
Once you have successfully performed a DIY repair on your car’s paint, taking the necessary precautions to protect the newly repaired areas is crucial. Proper aftercare will help maintain the finish and extend the life of your paint job. Here are essential tips for ensuring your car’s paint remains in excellent condition after repair:
- Avoid Direct Sunlight: Keep your car out of direct sunlight for at least a week after the repair. This helps the paint cure properly without the risk of overheating and bubbling.
- Gentle Washing: Wait at least a month before using automated car washes. Instead, hand wash your car with a mild soap to prevent damaging the fresh paint. Use a soft microfiber cloth to avoid scratches.
- Wax Your Car: After about two weeks, apply a high-quality wax. Waxing provides a protective barrier against environmental elements and enhances the shine of your freshly repaired paint.
- Maintain a Distance: Avoid keeping your car close to other vehicles for the first month. This minimizes the chances of accidental scratches or dents from nearby cars.
- Monitor for Damage: Regularly inspect the repaired area for any signs of discoloration or damage. Early detection is key to addressing issues before they worsen.
By following these aftercare steps, you ensure that your DIY paint repair not only looks great but also stands the test of time.


